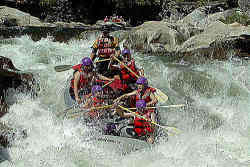
North Fork Stanislaus Mile-by-Mile Whitewater Rafting Guide
The following mile-by-mile river map describes some of the exciting highlights you can expect from this Intermediate-Advanced river trip.
Please note that this map is not intended to provide a complete list of
river hazards. Please include good judgement in your packing list. If you
do not have the appropriate level of experience to take on the challenge
of an advanced Class IV run, consider rafting
with a commercial whitewater rafting outfitter.
Mile-By-Mile Descriptions and River Map
 Mile 0: Beginner's Luck - Class IV-V: Note:
this rapid was severly altered after a dramatic landslide in the winter
of 1997, resulting in a new river channel. This triple tiered rapid is easily
scouted from river right. This rapid consists of a stair step drop at
the entrance which leads into a steep ramp with a large hole at the bottom
at flows above 1,000 cfs. The second drop in this rapid is the most dangerous,
most run it as far left as possible. This rapid should always be scouted
if you are not familiar with it or if you haven't seen it for a while. It
changes drastically at different flows and numerous logs have wedged themselves
within it. Scout river right.
Mile 0: Beginner's Luck - Class IV-V: Note:
this rapid was severly altered after a dramatic landslide in the winter
of 1997, resulting in a new river channel. This triple tiered rapid is easily
scouted from river right. This rapid consists of a stair step drop at
the entrance which leads into a steep ramp with a large hole at the bottom
at flows above 1,000 cfs. The second drop in this rapid is the most dangerous,
most run it as far left as possible. This rapid should always be scouted
if you are not familiar with it or if you haven't seen it for a while. It
changes drastically at different flows and numerous logs have wedged themselves
within it. Scout river right.
Mile 1: Rattlesnake - Class IV: An S-turn rapid with a reversal at
the entrance and a horn rock in the middle. There is an underwater table
rock just to the left of the horn rock and is very difficult to see, be
prepared to get slammed into it.
Mile 3: Bear Claw - Class IV: The river splits into two channels
here. The left channel is a steep ramp and the right is boulder slalom with
a wrap rock at the bottom.
 Mile 3: Convulsion (aka: Blow Your
Lunch) - Class IV: There are two main hazards in this rapid. There is
a sieve a little over half way down the rapid on the right wall. The last
drop has flipped its share of boaters. Scout river right.
Mile 3: Convulsion (aka: Blow Your
Lunch) - Class IV: There are two main hazards in this rapid. There is
a sieve a little over half way down the rapid on the right wall. The last
drop has flipped its share of boaters. Scout river right.
Mile 5:Wallet Slot - Class IV: This is a large boulder slalom with
a tricky finish. The bottom left side of this rapid is a huge sieve. Scout
river right.
Mile 5: Maycheck's Mayhem (aka: The Thing) - Class IV-V: This a
long rapid which is only made longer by the fact that immediately upstream
of it is a long technical class III rapid (The Mess) and it runs out into
a steep drop (Slinky). More then a few rafts have flipped on the pyramid
rock at the top of this rapid. In the middle of the rapid is another large
boulder that you can go left or right of. At high flows (above 1,800 cfs)
a perfect flat reversal is created at the bottom of this rapid, which has
surfed numerous boats for extended periods of time. Scout river left.
Mile 6: Slinky - Class IV: A stair step drop with a tombstone like
rock that splits the horizon line. The drop on the right side lands right
on a table rock.
Mile 7: Upper Sequoia Sluice - Class IV: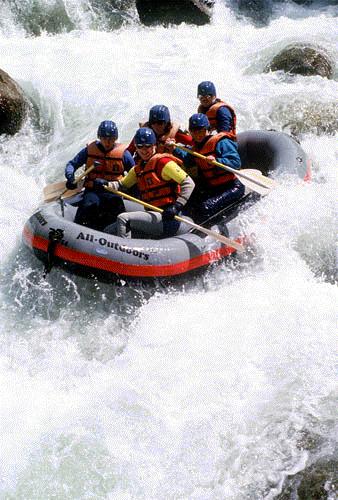 The next
3 rapids come right on top of the other. The river splits into two channels
here. There is a boulder in the middle and a shelf on the bottom.
The next
3 rapids come right on top of the other. The river splits into two channels
here. There is a boulder in the middle and a shelf on the bottom.
Mile 7: Middle Sequoia Sluice - Class IV: There are a few ways to
run this rapid. Most commonly people go down the right side of this rapid
over a series of three drops. Numerous boats have flipped at the entrance
of this rapid on the right wall as well as at the bottom drop.
Mile 7: Lower Sequoia Sluice (Big Trees Falls) - Class IV: A big-steep
drop on the right.
Images courtesy of All-Outdoors
California Whitewater Rafting